Thursday, October 25, 2012

Peacock Nails

I recently received a pair of Steve Madden sandals from The Red Tag Store (TRTS) , and I thought it would be a great way to thank them by sending a shout-out to them through my blog.  TRTS is located in the 2nd floor of Robinsons Starmills mall in San Fernando, Pampanga, and they sell authentic American apparel at very reasonable prices.

But because my blog is all about nail art, I couldn't just write about them and not do anything about nails! I therefore decided to create a glittery and glamorous nail design that will match the lovely sandals from TRTS.  Here is a picture of my nails and my foot side by side :)

Peacock nails on fingers and toes and my sandals from TRTS :)
This design was actually inspired by a picture shown to me by Abby Jocson.  Please do check out her bags, by the way.  Some styles are currently on sale!

Anyway, let's take another look at my finished nails before proceeding with the tutorial:

My version of Peacock Nails

So here is how I did it:

Materials:

  1. Nail Prep (Dazzle Dry)
  2. Base Coat (Dazzle Dry)
  3. Top Coat (Dazzle Dry)
  4. Teal nail polish (DD Mythic Teal)
  5. Gold nail polish (Nicole by OPI Not a Gold Bigger)
  6. Aqua nail polish (The Face Shop GR501)
  7. Acrylic paint
  8. Gold glitter striper polish (Art Deco)
  9. Glitter nail polish (Diana Manicure - Php70 from a Korean convenience store) 
  10. Big and small dotting tools
  11. Fine paint brush
Procedure:

After prepping nails and applying base coat, apply teal nail polish.  

Follow with a coat or two of glitter nail polish.

Use a fine brush and acrylic paint to create diagonal swipes from one corner of the nails.

Accentuate the green swipes by highlighting them with gold striper.  

Start creating the spots by making a big oval blob of gold polish.  Use a big dotting tool.

Make a smaller oval in the middle of the gold one with aqua polish, then a smaller one using the same teal polish as the base color.

Use a toothpick to make a tiny aqua spot in the lower part of the teal spot.

Wait for everything to dry, and apply top coat!
This has got to be one of my most elegant designs so far.  I love that they're creative, but at the same time chic and very wearable.  I do hope the coming days will be sunny so I can wear my Steve Madden sandals with them!


Helpful Tips:

  • Make sure that nails are completely dry before applying top coat! 
  • I used acrylic paint because I did not have a shade of green that I wanted.  Feel free to use nail polish if you have it.
  • If you do not have a gold striper, you may use a thin brush and dip it into gold nail polish. 
Thank you for reading!!!


Sunday, October 21, 2012

Halloween Nails 2012

With all the Halloween decors in malls and Trick or Treat events popping up, I thought it would be timely to create my own Halloween nail art for 2012.  I had a hard time choosing just one theme or monster, so I decided to paint the top 4 monsters that came to mind, together with a haunted house to pull the design together!  Here is my nail art with the haunted house, a witch, a vampire, Frankenstein, and a mummy!


Halloween Nail Art for 2012 by nailingitdown.blogspot.com !

Creating this look was quite difficult.  There really was no shortcut in making it -- I painted all nails with my lacquers of choice, then painted the details using acrylic paint.  

As I have been doing for a little more than a month now, I used only Dazzle Dry nail polish for the base colors.  It just makes so much sense to me to use non-toxic nail polish.  But I have to mention that I am not a paid endorser for the brand! Simply a well-satisfied customer :)

Anyway, let's carry on with how I came up with this Halloween nail art!

Materials:
  1. Nail Prep (I use this because I am using the Dazzle Dry nail polish system)
  2. Base Coat (Dazzle Dry)
  3. Top Coat (also DD!)
  4. Blue nail polish (DD Morning Sky)
  5. Pale yellow polish (DD Frozen Lemonade)
  6. Lavender polish (DD Lavender Parade)
  7. Light green polish (DD Pea Pod)
  8. White polish (DD White Lightning)
  9. Acrylic paint
  10. Fine paint brush 
  11. Small cup of water
Procedure:

After sanitizing my nails with nail prep and applying base coat, I painted all my nails with my chosen base colors.  This picture shows two coats of Frozen Lemonade, Lavender Parade and White Lightning, and three coats of Morning sky and Pea Pod.

The first step for all the nails is to create an outline of the details.

Next, fill up the spaces that need to be filled with color.

Carefully add details until you're satisfied. :)
Now that you have an idea of how I went about painting the details, here are close up shots of the other nails:
The mummy :)

Frankenstein (my personal favorite!)

The vampire (I made him purple because I remembered Count from Sesame Street was purple!)
The pale green-eyed witch!
Once you're happy with the design and the paint is all dry, top with top coat, and you're done!
It took me about two hours to finish this design, but I think it's worth it.  At least I know I have a chance at having the spookiest nails in town this week! Can't wait to spook my students out with these little monsters.  Hahaha!!

Helpful Tips:

  • I drew these monsters out of my imagination, but of course it may be helpful for you to search pictures for reference :)
  • Acrylic paint is perfect for making this design.  It dries fast and has less chances of smudging with top coat.  It is also way cheaper than having to buy all the colors in nail polish.
  • Acrylic paint can easily be erased using cotton with alcohol, so you might want to keep a bottle and some pads beside you while working.
  • Do not forget the top coat!!! The acrylic paint will wash off if you don't seal it in.
Thank you for reading!! Happy Halloween!


Tuesday, October 16, 2012

Easy Nautical Nail Art

Knowing how obsessed I am with nail art, my ever supportive boyfriend recently gave me a bunch of striper tape rolls from Amazon.  I thought it would be so insensitive of me not to use them, so after some browsing for nail designs that call for stripes, I finally came up with my own version of nautical nails.

My own version of nautical nails
I actually got the idea from one of my favorite nail artists, Cutepolish.  I made the design my own by changing up the colors and adding hearts to the striped nails for a more girly flair! This was her design:

Nautical nails by Cutepolish
As mentioned in the title, this design is EASY to make! You can even make it easier by dropping the anchor and just making all the nails striped with hearts.  The colors themselves are still nautical enough to stand alone!

And for those without nail striper tape, I have a suggestion on how to make your own, in any color you want! So keep reading :)

So let us begin with the tutorial!

Materials:

  1. Nail Prep (I use this because I am using the Dazzle Dry system)
  2. Base Coat (Dazzle Dry)
  3. Top Coat (also from DD!)
  4. Red polish (DD High Velocity Red)
  5. White Polish (DD White Lightning)
  6. Blue striper tape
  7. Dotting tools (big and small)
  8. Toothpick
  9. White Striper polish or white polish and thin paint brush
Procedure:

After prepping nails and applying base coat, paint all nails white, except for the ring finger which will be red.

Once nails are dry, carefully place strips of blue tape on your nails.  Keep them long initially, and trim them when you get the position you want.

Begin making the anchor by putting a big white dot on your nail.  

Now use a striper or a thin brush to paint the body of the anchor.

Finish off the anchor by using a toothpick to make triangles on the ends on the bend.  Add a smaller red dot in the center of the white dot.

To make the hearts, place two small red dots beside each other.  Connect them by spreading the polish with a toothpick, forming the pointed bottom of the hearts :)
Finish with top coat, and your done!

For those without striper tape, here is what you can do:
  1. Get clear sticky tape (regular plastic glossy type) in a tape dispenser and nail polish of your choice.
  2. Paint the straightened portion of the tape (the part between the roll itself and the cutter at the end)
  3. Once this is dry, pull the painted part past the cutter.  Hold the end of the tape with tweezers and carefully cut the tape into strips.  You can make them as thin or thick as you want.
  4. Use them like regular nail striper tape!!
  5. You can even use craft scissors to make different patterns :)
Thank you so much for reading!!

Saturday, October 6, 2012

Breast Cancer Awareness 2012

October is Breast Cancer Awareness month.  Every year in this month, people around the world campaign to increase awareness about the disease.  Because of this strengthened awareness, more women are being saved every year despite the growing number of breast cancer patients.

I'd like to take part in this worthy cause by creating a nail design with the pink ribbon used for the campaign.  I also made the design very pink to follow their theme.  I made pink roses inspired by Ms. Rina Alcantara's Blue Wave nail design.  Please click on the Blue Wave link to see her blog on her design. :)

My 2012 Breast Cancer Awareness nail art
If I am fortunate enough to still be blogging in the coming years, I'd like to make this an annual tradition of always dedicating a nail design to Breast Cancer Awareness.

One more thing I followed in making this design was making sure that it was as healthy for me as nail art could get.  For my nail polish, I only used Dazzle Dry, a vegan nail polish system that is free from the carcinogenic chemicals commonly found in nail polish.  To create the design, I used acrylic paint.  I suppose it is better than nail polish since it is just regular artist's paint and had almost no smell.

*Some more points on why I enjoyed using acrylic paint:

  • Mistakes can easily be erased with a cotton pad dipped in water (as long as you have not applied top coat yet).
  • It is way cheaper than buying several bottles of polish.
  • Consistency was easier to control than nail polish.  It did not get sticky the whole time I was working.
  • You get truer colors because blending is easier.
Please read more on using acrylic paints and nail art brushes on Rina Alcantara's blog here.  She is, after all, the queen of hand-painted nail designs!

Now on how I created my own design...

Materials:
  1. Dazzle Dry Trinity Set: Nail Prep, Base Coat, Top Coat
  2. White nail polish (DD White Lightning)
  3. Light pink nail polish (DD Girlishly Giddy)
  4. Dark pink nail polish (DD Cherry Parfait)
  5. Acrylic paint
  6. Nail art detailing brush
  7. A small cup of water
Procedure:

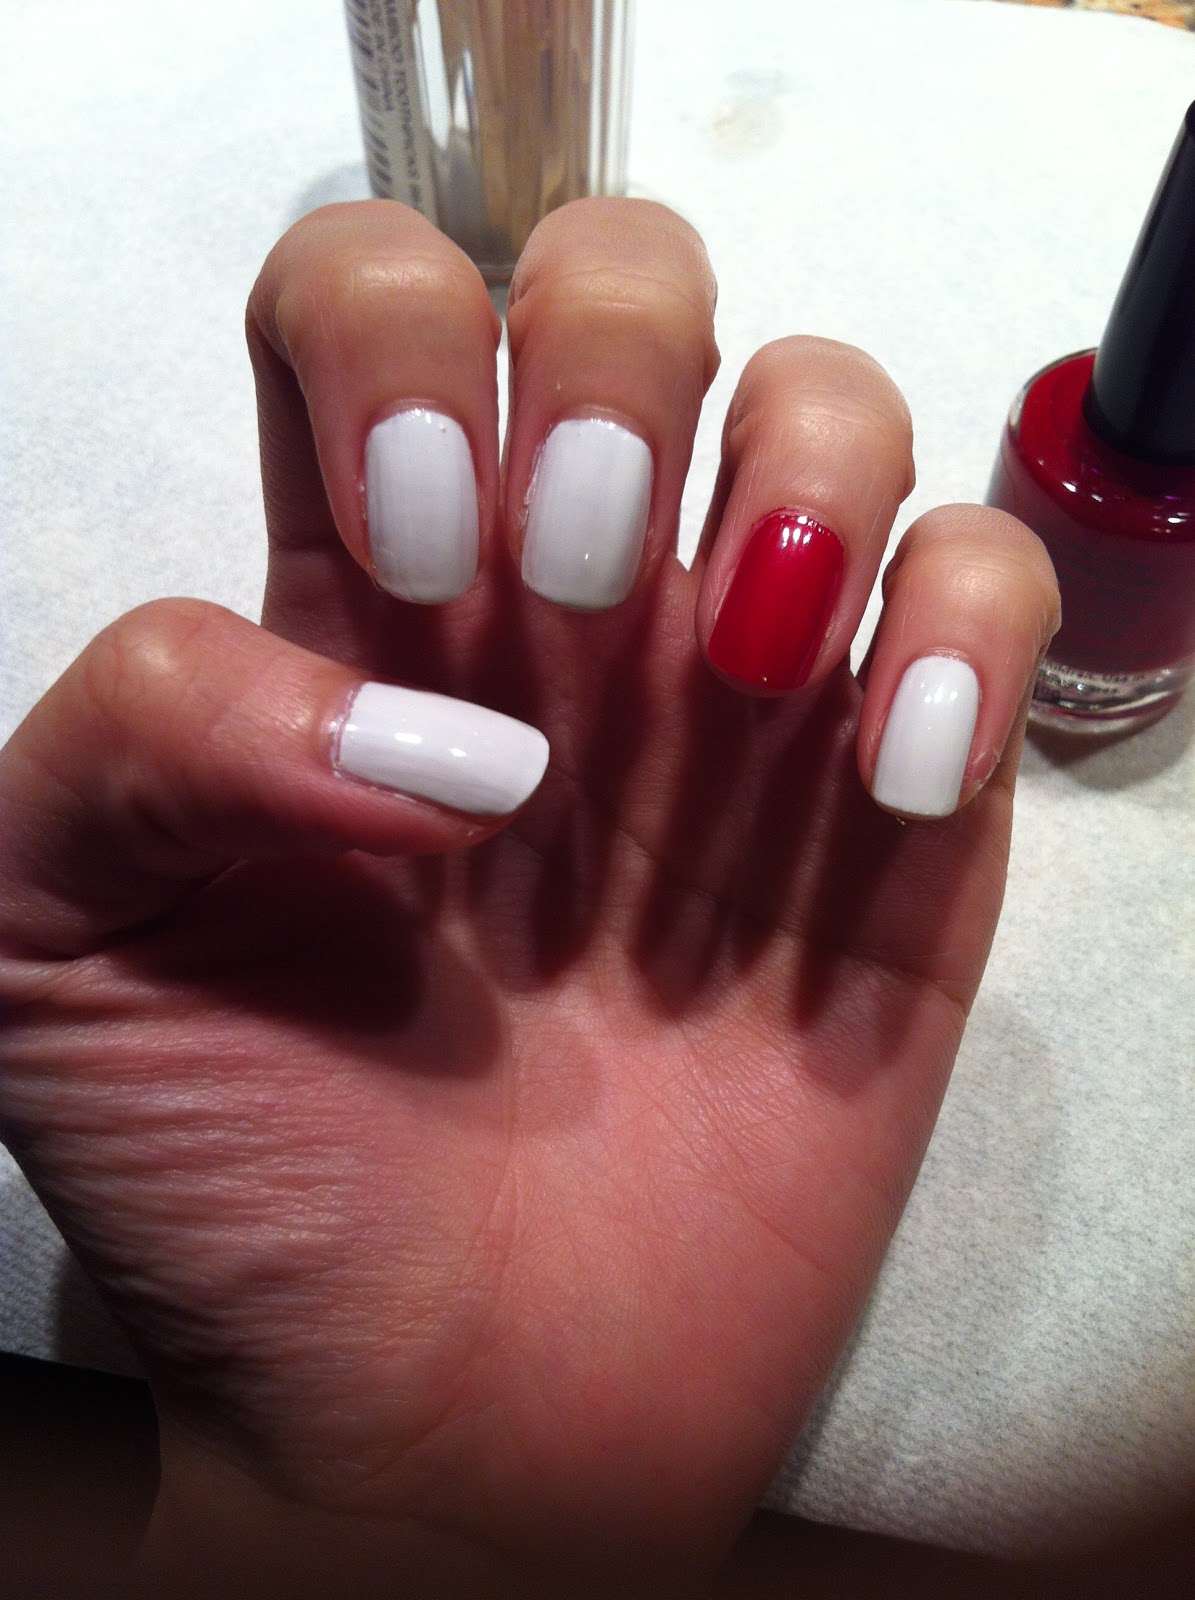
After using nail prep and base coat, I painted all nails white.

Using the brush of the light pink polish, I created a curve on my thumb and ring fingers, roughly making the nails half-white and half-pink.

I started creating the roses by putting a dot in the corner of the other nails, then making curved lines around it.

I TRIED recreating Rina Alcantara's blue wave by making the pink darker as I went along...

But as you can see, I failed.  I was not happy about this outcome!!! On the other hand, the pink ribbons looked decent so I kept them as is :)

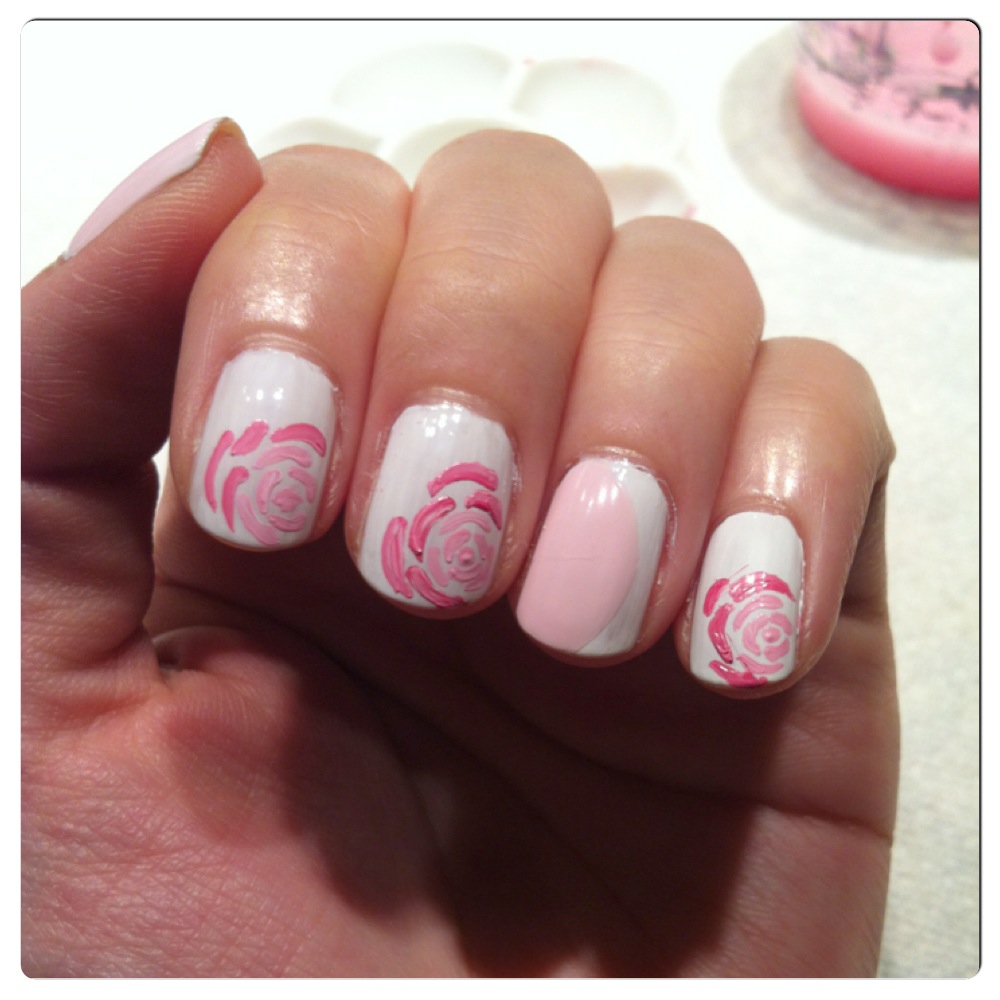
I erased the floral design on my pointer, middle finger and pinky, and did them again.  This time I used Cherry Parfait as base color, and used only 1 shade of pink for the whole flower (I think I need more practice in shading). The steps mentioned earlier were correct though :)

When everything was dry, I topped it with DD Top Coat, and I was ready to go in minutes!

I kept a picture of Rina Alcantara's Blue Wave on my iPad while working.  Isn't her work lovely??

Here is a picture of my acrylic paints.  The brand is Color&Co., and I got the set for Php375.

Helpful Tips:
  • When working with acrylic paint, dip the brush in a little water, and dip only the tip of the brush in paint.  That way, you have more control over the thickness of your strokes.
  • Rinse the brush once in a while in the cup of water to avoid paint build-up on the brush.  This makes the brush stiff and harder to control.
  • For beginners, blend the paint thoroughly before painting to get an even shade.  This was one of my mistakes in my first trial.
  • For this design, I realized after the first trial that I should have made my petals bigger.  Petals that are too small will make the design look messy and less rose-like.  (See my first trial picture!)
Thanks for reading!!

Wednesday, October 3, 2012

Masquerade Ball Nails

As I mentioned in my post Phantom of the Opera, I was deeply moved and was even brought to tears after watching the show.  Therefore, I decided another Phantom of the Opera inspired nail art was in order.  One of the scenes that was most visually appealing to me was the masquerade ball.  The costumes and the set were so elaborate.  I also thought it would be a great challenge, so here is what I came up with.  I hope it looks masquerade-ish enough!

Masquerade Ball Nails

I had two previous ideas before coming up with this design.  Idea 1: put a small mask on the tip of each nail, and idea 2: only put masks on the ring and thumb.  I didn't go with either because I figured they were both too predictable.  I also wanted something that looked grand so I opted to paint one mask that spreads across four fingers, and an elaborate mask with a feather on the thumb.

So here goes my tutorial!

Materials:

  1. Base Coat 
  2. Top Coat
  3. Light Pink polish (Dazzle Dry Girlishly Giddy)
  4. Dark Green (DD Mythic Teal) - you may use black or navy blue if you do not have dark green.
  5. 2 colors of glitter polish (The Face Shop PK101 and GR501)
  6. Striper polish in black and white (I used ArtDeco) - or black and white polish, and a thin paint brush
  7. Dotting tool - you may use a bobby pin
  8. Toothpick
Procedure:

After prepping and applying base coat, paint all nails light pink.

Paint dark green as seen above.  I only used the brush from the bottle.  It will give a more even texture than using a thin paint brush :) And don't worry if you get polish on the skin outside your nail like I did.  It's always easy to clean up :)

Use black striper or a thin paint brush to draw the laces of the mask.

Add eyes to the masks using a white striper, or a thin paint brush.  

Add glitter polish around the masks and the other fingers using the dotting tool.  You can put as many or as little dots as you wish. 

Use a toothpick to make the feather on the thumb.
Once everything is dry, apply top coat and it's all done!!

Helpful Tips:
  • For those with nail decals at hand, try putting rhinestones as accents to the masks.  It might turn out lovely!
  • I also think adding actual glitter to the design will help make it look more grand.
  • For those who want a more understated look, on the other hand, try putting a mask only on your ring and thumb finger, or even on just one finger, then painting the rest with glitter polish.  
  • Please be sure to allow your design to dry completely before applying top coat so as not to smudge it!
Thanks for reading!! :)