
Special thanks to Polished in the City for the blue polish I used in this design. It is "Snowcone" by Orly :)
Materials:
- Base Coat
- Top Coat
- Nail polish in: Orange, Green, White, Black, Purple, Blue (or any colors you want!)
- Very fine paint brush
- Toothpick or dotting tool
Procedure:
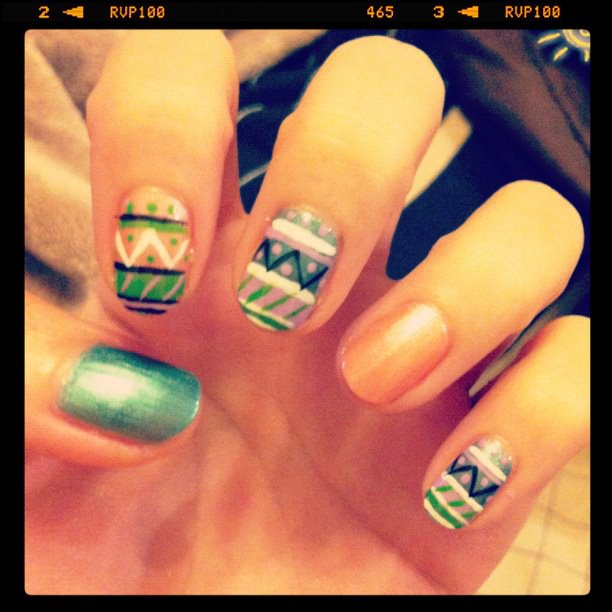
 |
| Apply base coat. Paint thumb nail green, and the rest orange. |
 |
| Start making fat and thin white stripes on the index, middle, and pinky. Do not worry about getting polish on the skin around your nails. Just clean up later on :) |
 |
| Use your paint brush to make black straight and zig-ziag lines. |
 |
| Continue playing with colors, making stripes and dots randomly. Have fun and be creative! |
And as I always say, apply top coat, and you're done!!
 |
| I had so much fun doing this nail art that I did another design using pearlescent colors as my base. Looks pretty, too! |
Helpful Tips:
- Use contrasting colors to maximize the impact of this design :)
- The patterns I painted on my nails were fairly uniform, but making each nail look totally different may also work for tribal nails.
- I found that having 2 plain nails actually pulled the look together (having overly printed nails may look "scattered").
Thanks for reading!!
No comments:
Post a Comment