Sunday, September 30, 2012

Nail Art for My Three Disney Girls

Because I rarely give details about my personal life in my blogs, a lot of you probably do not know that I work as a private tutor to young children.  I love my job -- I get to spend the whole day with kids, which makes work feel like play more often than not :)  I also love the fulfillment that comes with working with children.  Last week, grades for the first quarter came out, and I was so happy to hear that all three of my Grade 1 girls got into honor roll. :D

Earlier this year, I promised these girls that whoever gets honors will get a special prize from me -- nail art!  And to keep my promise, I scheduled to do their nails the day before they had their school Mooncake Festival, where they were allowed to dress up as any storybook character. I also thought it was fitting to make their costume the inspiration for each nail design (too bad I didn't see them in their costumes, thus no pics of them with their costumes on).

A note to all: due to the fact that I did nail art on very playful kids, I was not able to take step-by-step pictures for this entry... So no tutorial for this one! :(  I still hope you will enjoy looking at the pictures and the adorable little girls :)

The three nail designs I made for the girls, and a cute cartoon of a girl painting a rainbow (from iPhone App called Cute Wallpapers) I thought the cartoon was fitting for this collage.

I used only Dazzle Dry nail polish for all the girls.  It is vegan, non-toxic, and non-yellowing so I felt better using it on them.  It also helped a whole lot that the nail polish dried so fast because these girls couldn't wait to get up and play with their freshly done nails!

The first nail design I made was for the little girl who was going to dress up as Jessie from Toy Story.  I first thought about making cow prints to match her pants but thought otherwise because she would probably like something with more color.  So instead I painted her nails blue, then painted cacti with flowers, clouds, and a sun on her ring finger.  Colors used were: Morning Sky, White Lightning, Mythic Teal + Pea Pod (to make dark green cacti), Cherry Parfait, Frozen Lemonade, and Frozen Lemonade + High Velocity Red (to make orange).

Jessie and her Desert Nails

The next nail design I made was for Little Mermaid.  This girl was so funny.  She was very talkative, and was so amazed with how fast the nail polish was drying.  I quote, "Wow! It dries so fast.  Maybe that's why it's called Dazzle Dry!" So smart.  No wonder she got into honor roll. :p

For her nails I painted them light shimmery green to match Ariel's tail.  Then, I made white bubbles and pink flowers.  I later on received a message from her mom telling me how she calls her nails "award-winning nails."  Hahaha!  Colors used were: Pea Pod, White Lightning, Cherry Parfait, Lavender Parade and Mythic Teal.

Little Mermaid and her Award-Winning nails

Lastly, I made nail art for Princess Aurora of Sleeping Beauty.  Princess Aurora's dress is a combination of dark and light pink, with accents of gold.  Therefore, I painted her nails yellow, then made little hearts of dark and light pink.  Princess Aurora was the most excitable of all my Disney girls. She kept singing and wriggling the whole time I was painting her nails! She even said, "I have the most artistic tutor of all! My friends only get stamps from their tutors.  No nail art!"  Hmm... :p  Colors used were: Frozen Lemonade, Girlishly Giddy and Cherry Parfait.

Princess Aurora loving her Hearts nail art.  She even posed in character!
After each session with these girls, I felt as happy, or probably even happier than they did.  I feel really proud of these three little girls who make work so much more fulfilling.  Their lovely smiles and giddy giggles after seeing their nails made straining my eyes to paint their tiny fingernails all worth it.  

To these three little ladies, thank you.  I love you very much.  - Teacher Ninna 

Tuesday, September 25, 2012

Giraffe Nails

Inspiration strikes at any time, any day of the week.  Last Friday, a student of mine asked me to draw a giraffe for her to color.  When I saw how cute the drawing came out (too bad I didn't get to take a picture of it!), it struck me that I have never done giraffe nails! So that is how I got my inspiration for this nail art -- from the brilliance of a 6-year old. :)


This nail art is surprisingly easy to do, believe me :) I did not use any fine brushes -- I simply used the brush from the bottle, dotting tools and toothpicks!

Materials
  1. Base Coat
  2. Top Coat
  3. Nail polish in Yellow (Dazzle Dry Frozen Lemonade), Blue (DD Morning Sky), Brown (The Face Shop 802), Orange (TFS OR201), Black (TFS BK901)
  4. Toothpick
  5. Big Dotting Tool
  6. Small Dotting Tool
Procedure

After prepping and applying base coat, paint thumb and ring finger blue, and the rest yellow.

Using the brush from the bottle of yellow nail polish, paint an oval on the blue fingernails.

Also using the brush, swipe down to make the neck.

Swipe the brush on the sides of the head for ears and on top to make horns.

Use the big dotting tool to make brown tops on the horns.  Use the same dotting tool to make the mouth area orange.

Use a small dotting tool to make eyes and spots on the neck.  Then, use a toothpick to make a cute little smile!

Use the small dotting tool to make random giraffe spots on the rest of the fingers.

Let everything dry, and finish off with top coat!!

So in love with this design.  Just had to get another picture! Here you see my nails have grown out a bit, but gladly the design is still intact :)

Helpful Tips
  • Giraffe spots are slightly rectangular in shape.  It's good to note this to make the spots closer to the real thing ;)
  • If it is hard for you to to make giraffe spots by just basing it on your imagination, Google search giraffe patterns and have an image as reference.
  • You may also try just making 1 giraffe, maybe just on the ring finger or the thumb to cut time and effort.
  • For beginners who need bigger space for making the giraffes, why not draw them on your big toes? Might turn out cute ;)
Thanks for reading!! :)

Sunday, September 23, 2012

Layered Sweetheart Nails with Dazzle Dry

I promised in my post Bugs and Flowers that I will write about the awesome prizes I received from the nail art contest that I joined, so this blog will be a review+tutorial.  I hope you will still find this interesting, despite the length! :)

The contest I joined was by Dazzle Dry Philippines.  Dazzle Dry is a vegan nail polish system.  I know what you're thinking -- "Vegan nail polish?? What's that??!"  That's exactly what I thought when I first heard about it.  The company claims that their products are free of the harmful chemicals commonly found in regular nail polish.  Even more, your nails are expected to dry rock hard in just 5 minutes.  Here is the video that shows how to use the Dazzle Dry system:  


Too good to be true? I just had to find out for myself.  Unfortunately, Dazzle Dry is not yet available for retail in the Philippines.  Salons all over Metro Manila carry the brand and use it for their mani and pedi services, but customers cannot buy the products for themselves.  Being fully aware of the long-term effects of these chemicals to my body, I knew I just had to try winning this nail art contest so I can have my very own set of Dazzle Dry nail polish system.  

True enough, I placed second in the competition and I received the following from DD Philippines:

My awesome prizes from Dazzle Dry Philippines: a complete set of of 1 oz. nail prep, .5 oz. base coat, and .5 oz. top coat, with 2 additional colors of my choice: Morning Sky and Girlishly Giddy!

Curious as I was about this brand, I immediately opened the items and observed them.  First thing I noticed was the smell - or the lack of it, that is.  I still do not suggest sniffing it out of the bottle, but it surely smells much milder than regular polish. The box also specifically notes that the vegan nail polish system contains no camphor, formaldehyde, toluene and phthalate.  I was very happy about this!

To test if the nail polish really dries rock hard in just 5 minutes, I decided to do a sweetheart layered design on my sister that I have been having such a hard time doing with regular nail polish, basically because it requires each layer of nail polish to be completely dry before proceeding to the next.  Here is a picture that shows the summary of how I did her nails:

My experiment proved effective.  I finished this look on my sister in half an hour,  following all the required steps of the DD system, and including all drying times in between each color!
Needless to say, I am very happy with how Dazzle Dry performed for me.  I do wish I had more of this brand to use as base colors, or even for accents on my nail designs.  Join me in telling them how badly we want this to be available retail!!!

A more detailed tutorial follows below, for those who want instructions on how to do this very easy design. :)

Materials:
  1. DD nail prep
  2. DD base coat
  3. DD top coat
  4. DD in Morning Sky
  5. DD in Girlishly Giddy
  6. Pale yellow nail polish
  7. Round label stickers
Procedure:

After using nail prep and base coat, apply 2-3 coats of Morning Sky

Place 2 label stickers at the bottom of each nail.  (I actually waited only a minute and realized that her nails were already completely dry!)

Apply 2 coats of Girlishly Giddy on the uncovered part of the nails.

Once nails are dry, peel stickers off and move them up, nearer the tips of the nails.  Apply yellow polish.

Let last layer dry, peel stickers off, and finish with top coat!
I love how simple but cute this design is.  And you really do not need heavy art skills for it!


Helpful Tips:
  • When placing the stickers, I found it easier to stick the 2 pieces together first, then putting both on the nail at the same time.  That way, I could see where the dip of the heart will be.
  • Be cautious about spacing, to make sure each layer looks roughly as thick at the others.  
  • Of course you can try this with other nail polish brands, and not just Dazzle Dry.  But I do suggest using a very fast drying polish.  Last time I tried doing this I spent 2 hours trying to get the look to no avail because my polish wasn't drying enough.
  • Try swapping the colors around on some nails to come up with an edgier design!
Thanks for reading! :)

PS. I thought some of you might want to know where they can get their Dazzle Dry mani-pedi done.  The following salons in Metro Manila offer Dazzle Dry services:

QUEZON CITY
1. AURA (Across Ateneo)
2F Palodoma Bldg
313 Katipunan Ave
Loyola Hts QC
Contact #: 423-1410; 426-6992; (0921) 567 8490.

2. NAIL IT/ Abada
23 Fabian dela Rosa St. Cor. Esteban Abada, Unit 106, Loyola Heights Condominium,
Loyola Heights, QC
Contact #: 491-5171.

3. NAIL IT Alvero (At the back of Shakey's Loyola Heights)
91 Rosa Alvero St., Unit 2A,
J & R Con Con Bldg.
Loyola Heights, QC
Contact #: 387-2759.

4. RUNWAY (Close to Ayala Heights)
2nd Flr Capitol Greenstreet
Capitol Golf & Country Club
Capitol Hills Dr., QC
Contact #: 952-2539; (0917) 538 7868

MANDALUYONG/PASIG
1. STUDIO 546
Level 5, Shangrila Plaza Mall
EDSA corner Shaw Blvd
Mandaluyong City
Contact #:638-3956

2. NAIL TROPICS/ Shangrila**
Inside Rustan's Dept. Store, Level 1 Cosmetics
(near GAP entrance)
Shangrila Plaza Mall
EDSA corner Shaw Blvd.
Mandaluyong City
Contact#: 622-6349; 0917 801 NAIL (6245)
**Please inform them that you want the Dazzle Dry mani/ pedi when you make your advance reservations.

PASIG CITY
1. NAIL IT/ Pearl Drive
8101 Pearl Plaza Bldg., 2nd Floor
Pearl Drive, Brgy San Antonio
(Ortigas Center area)
Pasig City
Contact#: 408-3401; 470-8583

2. NAIL IT/ Rockwell
(Beside Medical City, same building as McDonalds)
Tower 2, Unit N-05 Plus, The Rockwell Business Center (RCBC)
Meralco Avenue, Brgy Ugong
Pasig City
Contact#: 494-5713

GREENHILLS, SAN JUAN
1. NAIL IT
2nd Floor, Connecticut Arcade
Greenhills, San Juan
Contact#: 806-1545; 661-4418

MAKATI
1. THE SPA GREENBELT
Ground Floor, Paseo de Roxas
Drop Off Entrance, Greenbelt 1
Makati City
Contact#: 840-1325; 840-1326

2. NAIL IT/ Glorietta 3
3rd Floor, Glorietta 3, Unit 313
Ayala Center
Makati City
Contact#: 474-7378

3. NAIL TROPICS/ Greenbelt 5**
4th Level, Zara side
Greenbelt 5
Contact#: 501-9999; 0917 852 1662
**Please inform them that you want the Dazzle Dry mani/ pedi when you make your advance reservations.

THE FORT/ TAGUIG
1. POSH NAILS/ McKinley Hill
2nd Level The Venice Mall
McKinley Hill Piazza
Taguig City
Contact#: 798-0074; 359-5384

2. THE SPA/ Fort
Bldg. 8, 908 Bonifacio high Street
Bonifacio Global City, Taguig
Contact#:856-6868; 856-5858

PARANAQUE
1. NAIL IT
#76 Dona Soledad Avenue, JDP Bldg.
Better Living Subd.
Paranaque City
Contact#: 659-2115

ALABANG
1. NAIL IT/ Festival Mall (Across Max's)
3rd Floor, Festival Supermall
Filinvest Corporate
Alabang, Muntinlupa City
Contact#: 806-7431

DAVAO CITY
1. NAIL BAR
McPod Bldg.
Acacia St. corner McArthur Highway
Juna Subd., Matina
Davao City
Contact#: 295-1822

Wednesday, September 19, 2012

Phantom of the Opera

Phantom of the Opera is currently showing in Manila, and I watched it with a few friends (it was actually a double date!).  My friend and I were so excited to watch it that she asked me to paint her nails with a Phantom of the Opera theme, and I willingly agreed, not knowing how on earth I was going to do it!

Surprisingly, I was able to come up with a passable nail design following her theme of choice, and here is the final look, with my inspiration:

Phantom of the Opera Nail Art

I actually did her nails on the same afternoon that I created my Bugs and Flowers design on myself, so I got quite dizzy! The fun we got out of it and the outcome were very well worth it though. ;)

My friend and I with our freshly done nails <3
I hope you are as excited as I am about this design.  Here goes the tutorial!

Materials:


  1. Base Coat
  2. Top Coat
  3. Nail Polish in: Black, Navy Blue (optional), White, Red, Pink, Green 
  4. Fine brush
  5. Dotting tool

Procedure:

After applying base coat, paint all nails black or navy blue.   We used navy blue because I didn't realize my black has already started going sticky.

Paint the shape of the mask on the thumb using a thin brush.  Draw the outline first, then fill it in.

Draw a thin diagonal line on the ring finger, then fill the bottom with white polish.

Add the eye and a rose to the thumb.  To make the rose, use a dotting tool and red polish to make the flower.  Then, use a thin paint brush dipped in green polish to make the stem and leaves.  

Draw black vertical lines in the ring finger to make the keyboard of a piano.
I then added roses to the rest of her fingers by doing the same steps as the rose on the thumb.  To add texture to the roses, dip a thin brush into pink polish and make curved lines on the flowers.

As always, finish off your design with a coat or two of a good top coat to seal in that design!

Helpful Tips:
  • The mask was the most challenging part of creating this design.  If you are not too good at drawing, you may try using acrylic paint (the type from bookstores).  When you use this on your lacquered nails, you may easily erase mistakes with a wet piece of tissue.  
  • You may also practice drawing the mask on a piece of paper first ;)
  • I found that the navy blue I used for this design worked better than black.  It gave more "drama" to the design. Moral of the story: Be open to options!

*The production of Phantom of the Opera here in Manila was simply beautiful.  In fact, I found myself fighting back tears at the end of the show.  I highly encourage those who have not seen it to try and catch it before the season ends. <3


Tuesday, September 18, 2012

Bugs and Flowers


For this nail art, I am going to feature one of my most animated designs, featuring a different design on each hand. :)


This design is so much fun to create and wear.  I started out planning to simply paint a bee followed by a trail of dots.  In the middle of painting the bee, I thought, "why not add a flower?" That idea was then followed by adding a beehive.  And when I got to re-doing the design on the other hand, another idea struck me and so I made a butterfly flying from flower to flower. It is the first time that I stuck to one theme but made a different design on each hand, and I don't know why I never did it before!  Read on to see the materials behind-the-scene pictures in creating this design. :)

I am also very proud to announce that I placed second in the nail art contest that I mentioned in my last post, and as expected I was very eager to use the prizes I received from them! For this nail art I used Morning Sky by Dazzle Dry.  More about these awesome prizes in my next entry, so stay tuned ;)

Materials:
  1. Top Coat
  2. Base Coat
  3. Nail polish in: light blue (Dazzle Dry Morning Sky), black (The Face Shop Lovely Me:Ex BK901), yellow (Sally Hansen Insta-Dry  in Lightening), brown (The Face Shop Face It BR802), pink (The Face Shop Lovely Me:Ex PK102), green (Revlon Sassy 501), orange (The Face Shop Lovely Me:Ex OR201)
  4. Dotting tool
  5. Thin paint brush
Procedure:
After applying base coat, paint all your nails with your chosen shade of blue.

Paint petals on your fingers using either a dotting tool or a thin paint brush.

Dot the centers of the flowers with yellow.  Use a thin paint brush and green polish to make the stem and leaves (Sorry I  forgot to take a photo of that step!).

To make the bee, first use a dotting tool to make the wings, and then use the dotting tool to make two black dots on top of each other.
Add antennae and a stinger to the bee.
Add yellow dots in the middle of the black dots. 
Later on add details using a thin paint brush for the stripe and a dotting tool for the eyes. You may also use toothpicks if you want the eyes really small :)
To make the beehive, I mixed together yellow and brown polish.  I then used a dotting tool to make the shape of a beehive.
Add details using a fine paint brush and black nail polish.  I also added a tree branch using brown and green polish.
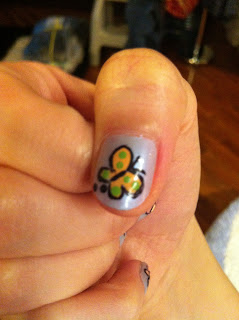
To make the butterfly, use a dotting tool to make the shape of the orange wings and the green dots.  Outline with black polish and a fine brush.

Add dots to both hands to show the trail of the bugs. :)

As always, top with top coat, and you're done!!

Helpful Tips:


  • This design needs lots of layering of colors.  Be sure to wait for the layers to dry before proceeding to the next step.
  • If you tend to get impatient (like me!), go on doing the initial steps of the other items on other fingers first.  This will let drying time go faster than it seems :)
  • Use as little polish as possible when making the designs.  Not only will it dry faster, but it will also be less prone to accidents such as smudging.
Thank you for reading!  

Tuesday, September 11, 2012

I entered my first nail art contest!

I recently entered my very first nail art contest! I saw it on Facebook, and I figured I'll just try my hand at it. The contest was by Dazzle Dry Philippines, and it was entitled "Newsworthy Nails".


Each person was allowed to have three entries for the contest, and since I paint my nails regularly anyway, I submitted three nail arts. But for this nail art tutorial, I'd like to focus on my main entry.  I called my entry "Flowers for Ronald Gadayan", in honor of Mr. Gadayan's honesty when he returned a designer bag filled with Php600,000 while he was working as a glass cleaner at the Ninoy Aquino International Airport (the contest is called "Newsworthy Nails", after all).

My main entry for the Newsworthy Nails nail art challenge :)
Creating this design was quite complicated, since I wanted it to look like a painting.  I actually used a total of 10 nail polish colors to make this design!

My army of colors in creating this nail art (from The Face Shop, Revlon, and Orly c/o Polished in the City)
For those who are patient enough to try making this design, here goes my little tutorial!

Materials:

  1. Base Coat
  2. Top Coat
  3. Nail polish in: white, pale yellow, pale orange, bright orange, light green, dark green, sky blue, lavender, brown, black
  4. Thin paint brush
  5. Cotton
  6. Nail polish remover
Procedure:

After applying base coat, paint all nails sky blue.

Blend dark and light green together on a piece of paper or plastic and use a paint brush to make random stripes. The combination of dark and light green will add texture to the grass (picture does not do it justice!!)

Use lavender to make petals.
Now add white over the lavender, but making sure the lavender is still slightly visible.  The lavender will look like shadow underneath the white petals.
Mix brown and pale orange to create the color of the centers.  Dot in the center of each flower.

To create the butterfly, I first painted the shape of the wings with bright orange polish.  I then added the black details, and finished off with tiny spots of pale yellow.  Monarch butterfly :)

As always, finish with top coat, and you're done!

Helpful Tips:

  • When painting with a brush, clean it once in a while with a cotton dampened with nail polish remover to keep it soft and fine.  
  • If you do not have any of the colors that I used, remember that you can always blend your own colors.  They might even turn out nicer!
  • I used lavender because I didn't have light grey, and that shade would be too hard to mix.  If you have off white or very light grey, those colors will look better as "shadow petals". :)

By the way, here are my other two entries for the contest:

Wild Animals
Fruits and Vegetables (Dazzle Dry is a vegan nail polish brand. Lol)
Thanks for reading!! :)